
Came home from a particularly gruelling day at the office, to find my Dime City Cycles order sitting on my bed! Tim had been kind enough to take time out of his day to swing by the local post office and pick it up for me. I hurriedly opened the box and stripped the packaging away to reveal a bounty of great quality parts that I’d ordered no more than a fortnight ago.

Dime City Cycles Order
I had grand plans for completing the Kawasaki KZ250 side covers in the evening, but the glistening “shorty” muffler I’d ordered presented a temptation that was far too difficult to ignore…. So I commenced swapping out the dinged and dented stock exhaust muffler and replacing it with the brand new 12 inch shorty muffler that had been delivered.
Before Commencing The Muffler Swap
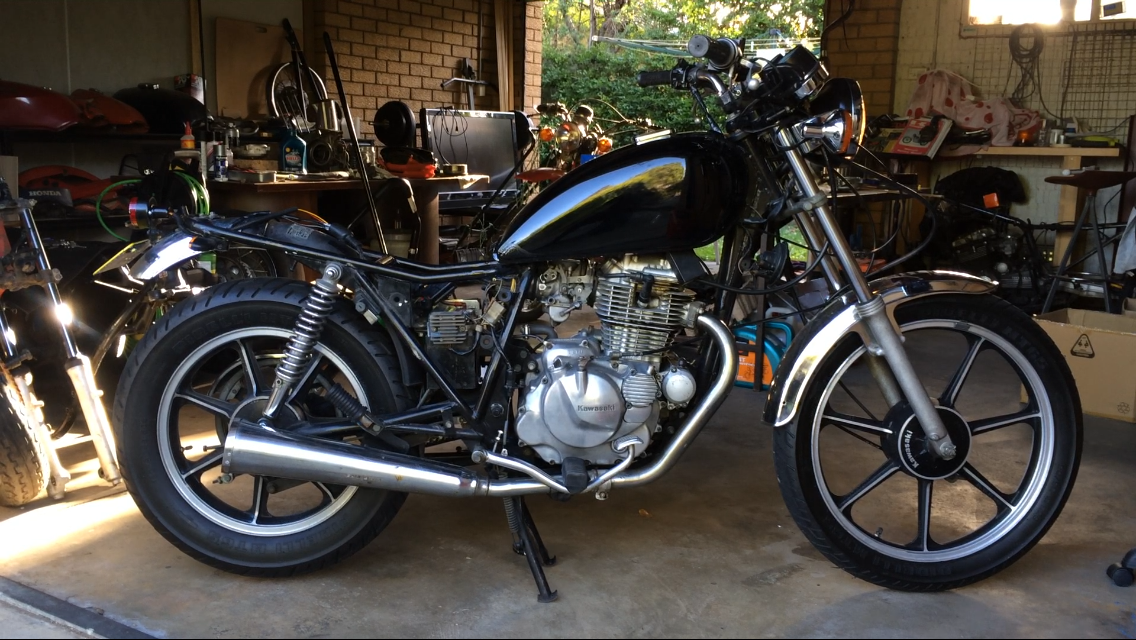
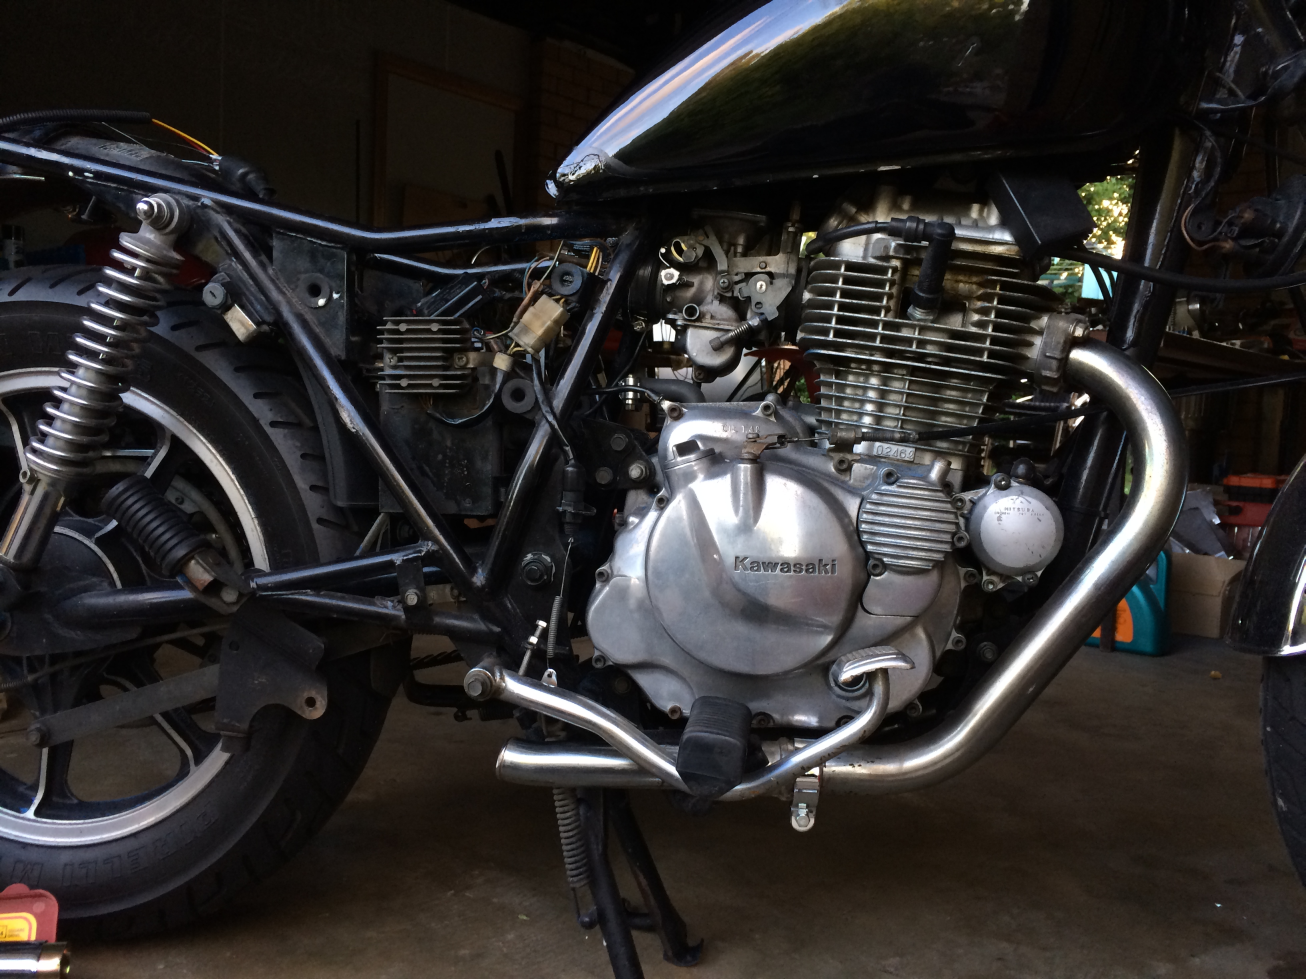
The stock exhaust muffler never looked truly terrible in my opinion, although it had many negative points when taking a closer look. It was heavy, large, rusted in parts, losing air through poor connections to the mid-pipe, and its general aesthetic was not what I was after for my completed flat tracker. It was time to go!

Old Versus New
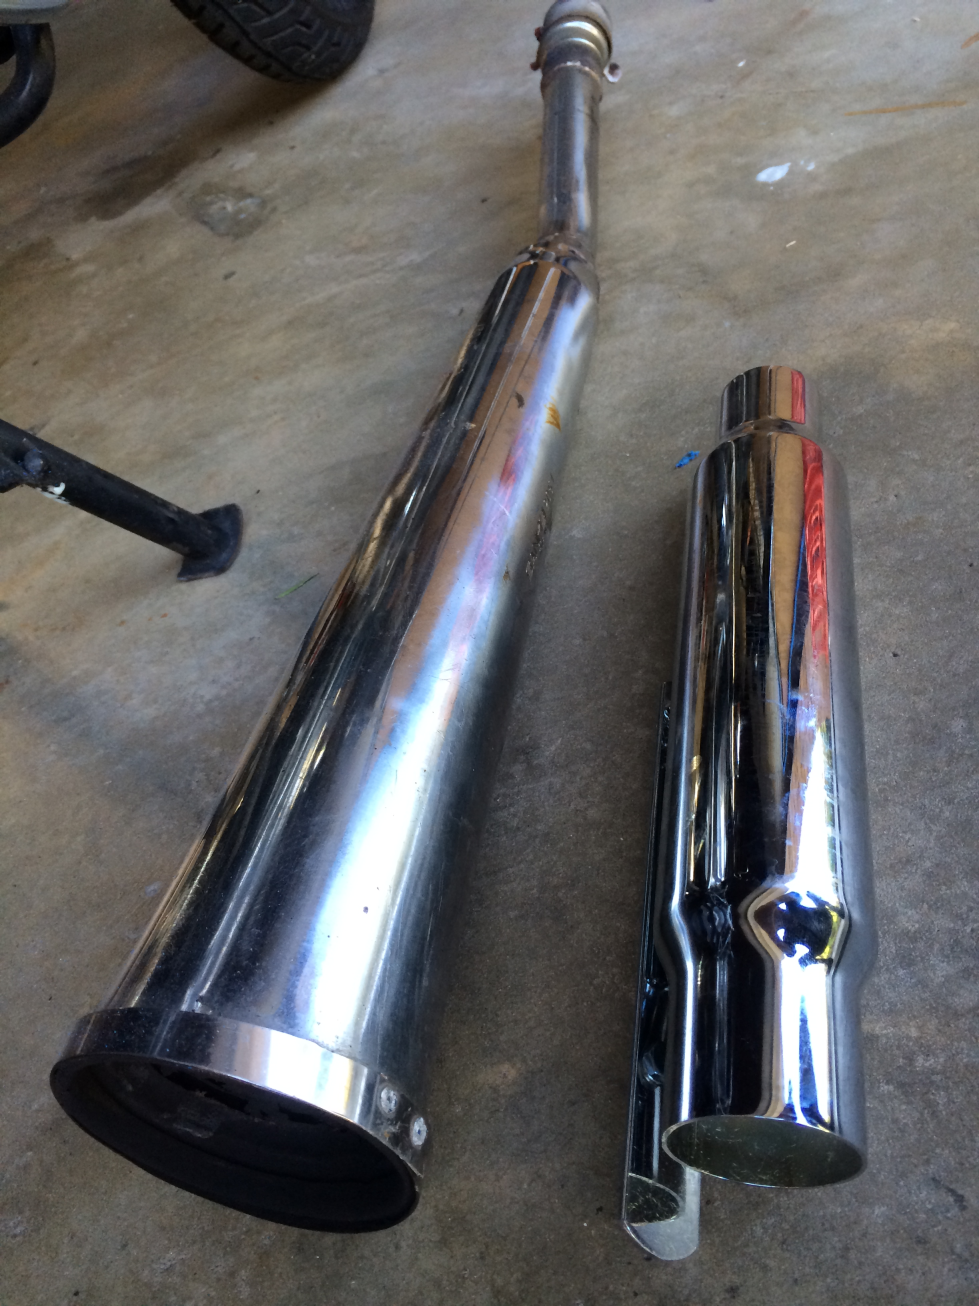
Old Versus New Outlet
It became apparent that I’d need to sever the mid-pipe from the stock exhaust muffler as it was welded on, rather than clamped.
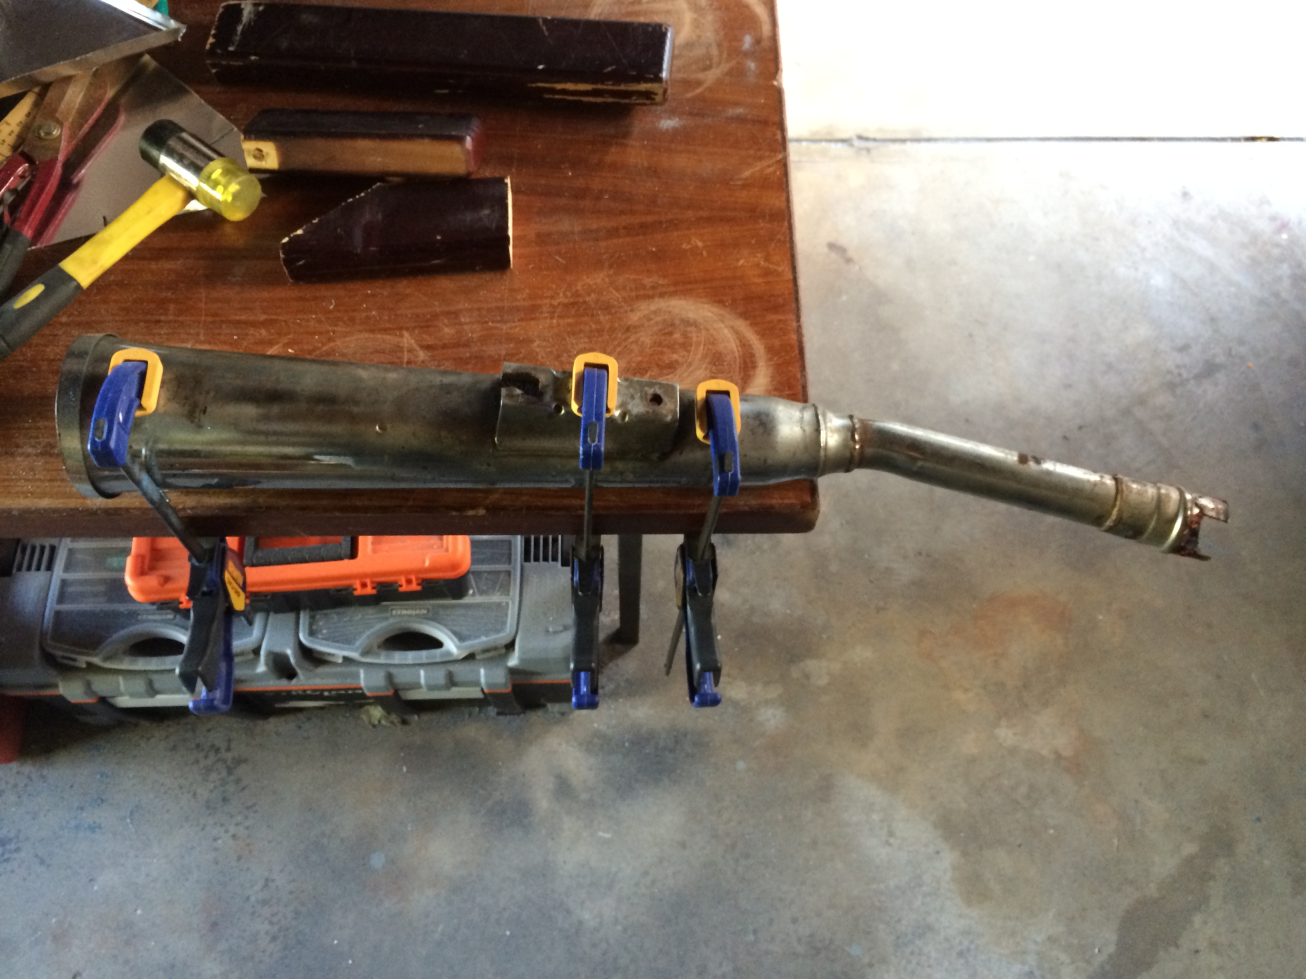
Clamped Down For Separating The Mid-Pipe

The Place I Chose To Cut
With the muffler clamped down, I chose a line on the weld closest to the muffler, and commenced cutting the mid-pipe clear.

Mid-Pipe Separated From Muffler
The cut I’d made was quite clean, however due to the raised weld that I’d cut through, I decided to clean up the edge using a flap-wheel. The result was quite nice in my opinion (pictured below).
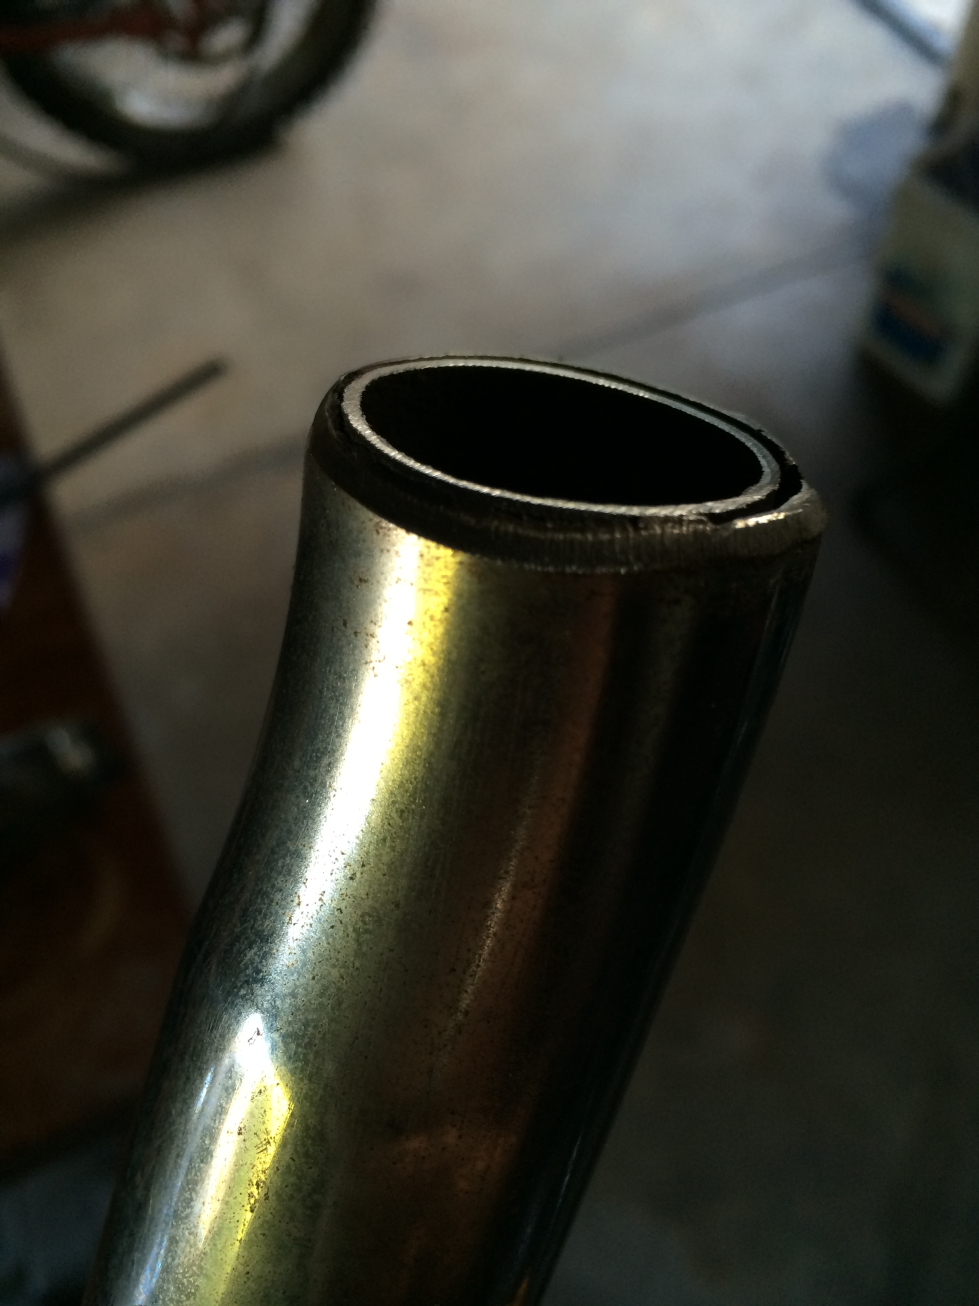
Cleaned Mid-Pipe Join
With the mid-pipe separated, I decided to give it a quick once over with some steel wool to regain some of its past lustre. Once I finished with the steel wool, I proceeded to install the salvaged mid-pipe and new shorty muffler.
Mid-Pipe Installed With Exhaust Clamp
With relative ease, the mid-pipe re-seated securely with the exhaust header pipe. I swapped out the old, rusty, cheap exhaust clamp for one I’d received as a part of my Dime City Cycles order.

Shorty Muffler Fitted
With a surprising amount of effort (utilising some universal exhaust pipe reducers I’d purchased from Dime City Cycles also) I managed to fit the shorty muffler to the mid-pipe. The clearance from all surrounding assemblies was quite good, so the last thing to tackle was the muffler hanger. The shorty muffler came with a small length of metal that was designed to be drilled to form a hanger that could fit most motorcycle frames in some way or another. Fortunately for me, I am looking to retain the pillion foot pegs on the Kawasaki KZ250, and so I was able to make the necessary hole in the shorty muffler hanger and neatly bolt it behind the right pillion foot peg.
All Done – Shorty Fitted w/Hanger
All sorted! The shorty went on with relative ease and a little coaxing. The sound difference is quite phenomenal! I’m quite happy with the obnoxious noise the shorter (straighter) pipe gives. I would like to look at raising the muffler outlet a little before signing this project off, but I will wait till after lowering the front-end a little to see if that gives it the stance I am looking for.
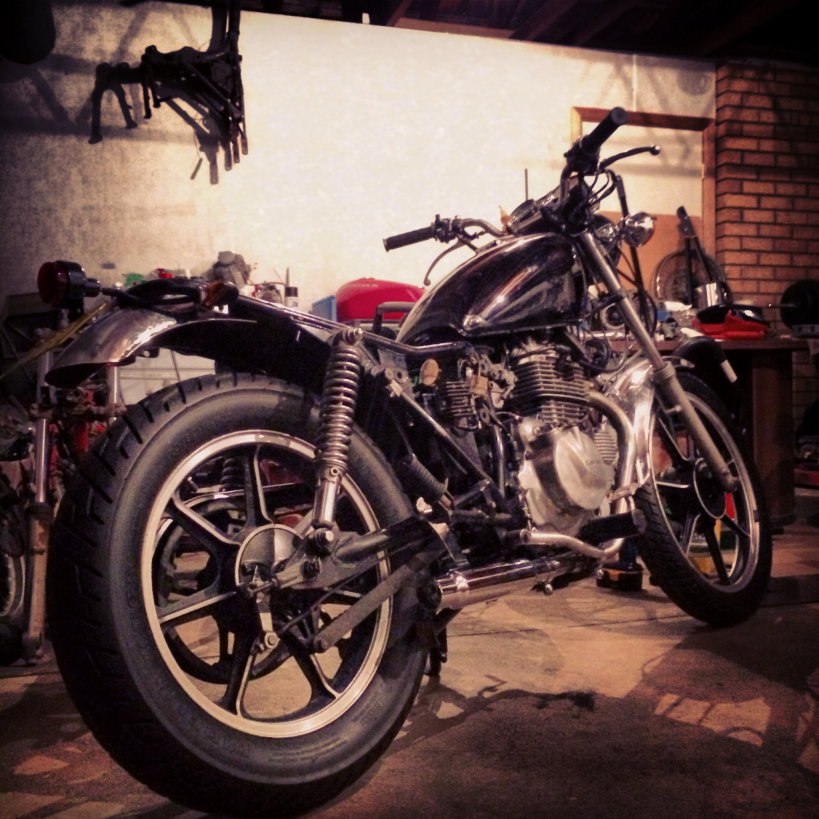
Looking Nice And Tidy
For a quick peak at an unfair comparison between stock and shorty, please feel free to check out the video I put together (below). I must preface the video by saying that the changes in air intake as well as the change in exhaust length/throughput makes the bike run like a bucket of snot. The carburettor needs re-jetting and tune tune – once done, I am confident she will sound tremendous!