
I’ve been out of action for a little while due to my pilgrimage down to Phillip Island over the last couple of weeks, however I’ve managed to dive straight back into things.
First port of call was to address the infernal carburetor leak issue and ensure that the carburetor sends petrol (and air) into the motor properly.

Rebuilt Carburetor
First step I took was to choose the better of the two carburetors I have on hand. I found that the one that had a better exterior appearance was shocking on the inside. Now I know the carburetor I selected doesn’t look pretty (pictured above) but she’s in remarkably good condition internally, as I was soon to find out.

Float Cover Removed
I proceeded with rebuilding this remarkably simple carburetor. First off was the float bowl cover – I removed this and was very pleased to find no “carb jelly” as I’ve started to see a lot of in old original carburetors that have been sitting idle of un-serviced for decades.

Float Removed
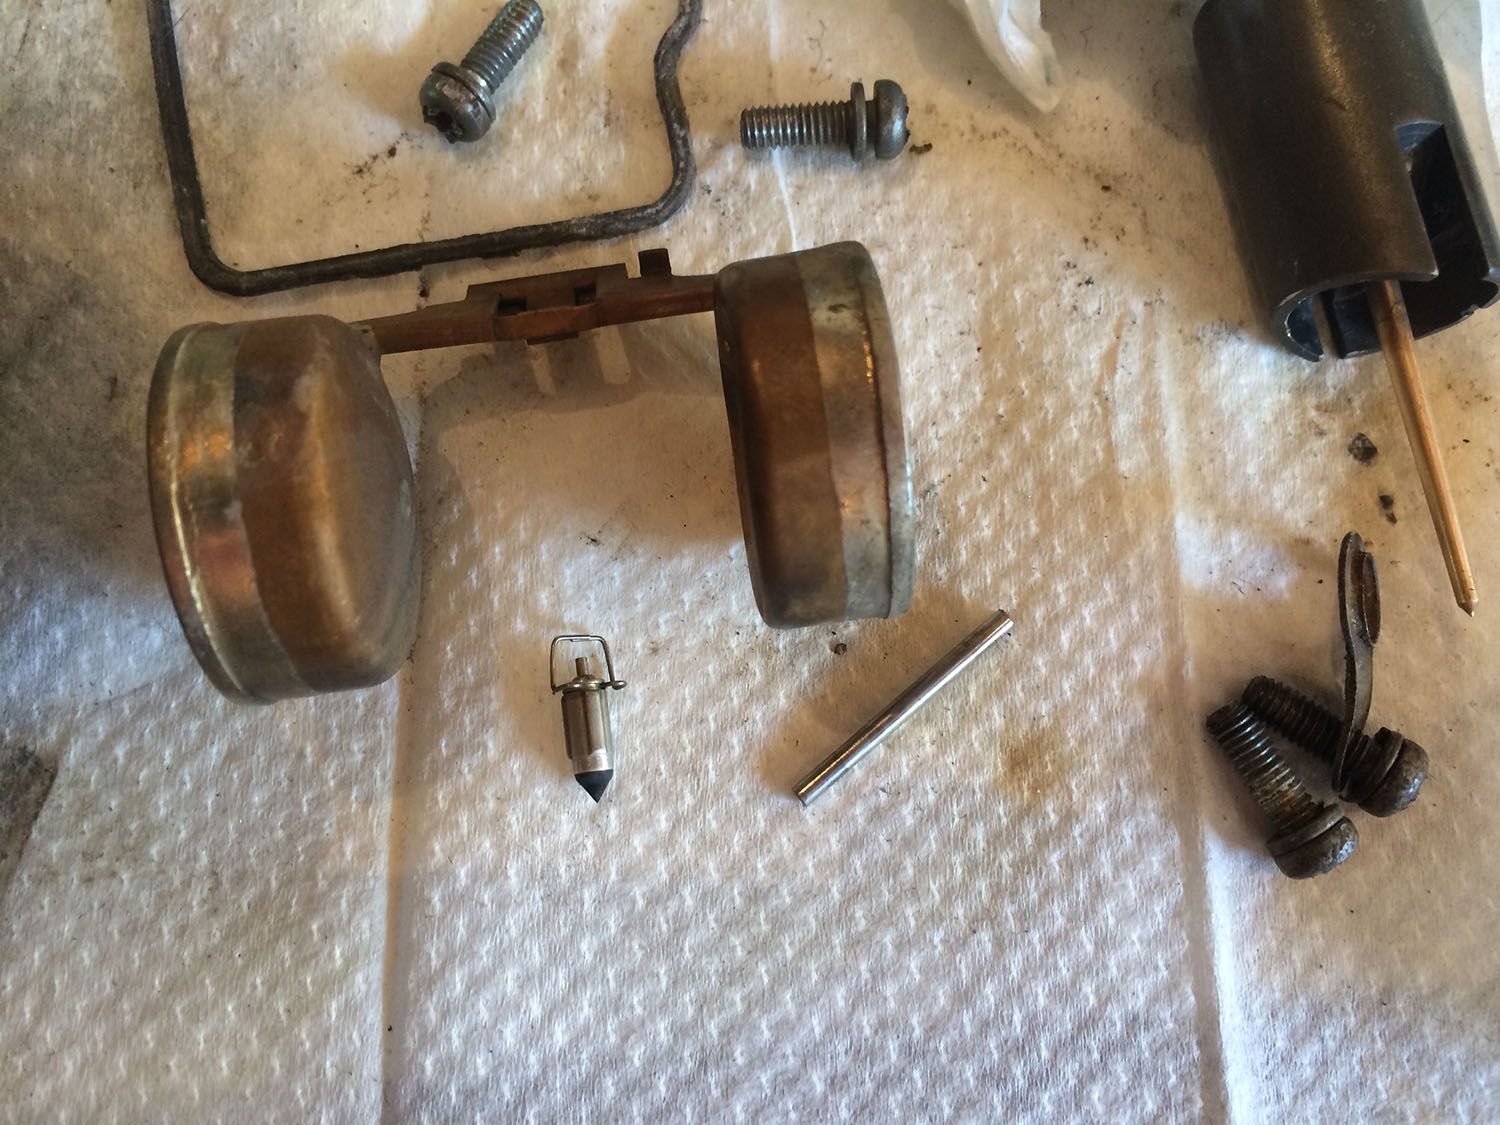
Carburetor Float
When disassembling such a simple carburetor, there are really only a few parts that need to be looked at to ensure it is operating normally. In order to make sure everything was doing what it should, I gently elevated the float to see if the float valve was shutting the fuel line properly. It looked like it was, but just to be sure, I spent some time cleaning the float valve needle and the float valve seat as well.

Float Valve Needle & Float Pin
Once I was sure the float valve action was working as well as it should, I commenced reassembling the carburetor. I paid particular attention to sealing the float cover by rejuvenating the thin rubber gasket that fits between. The gasket was intact and formed a great seal when I tightened all the related screws. Once I’d put it back together, I re-seated it on the motor and ensured it was tightly fixed.
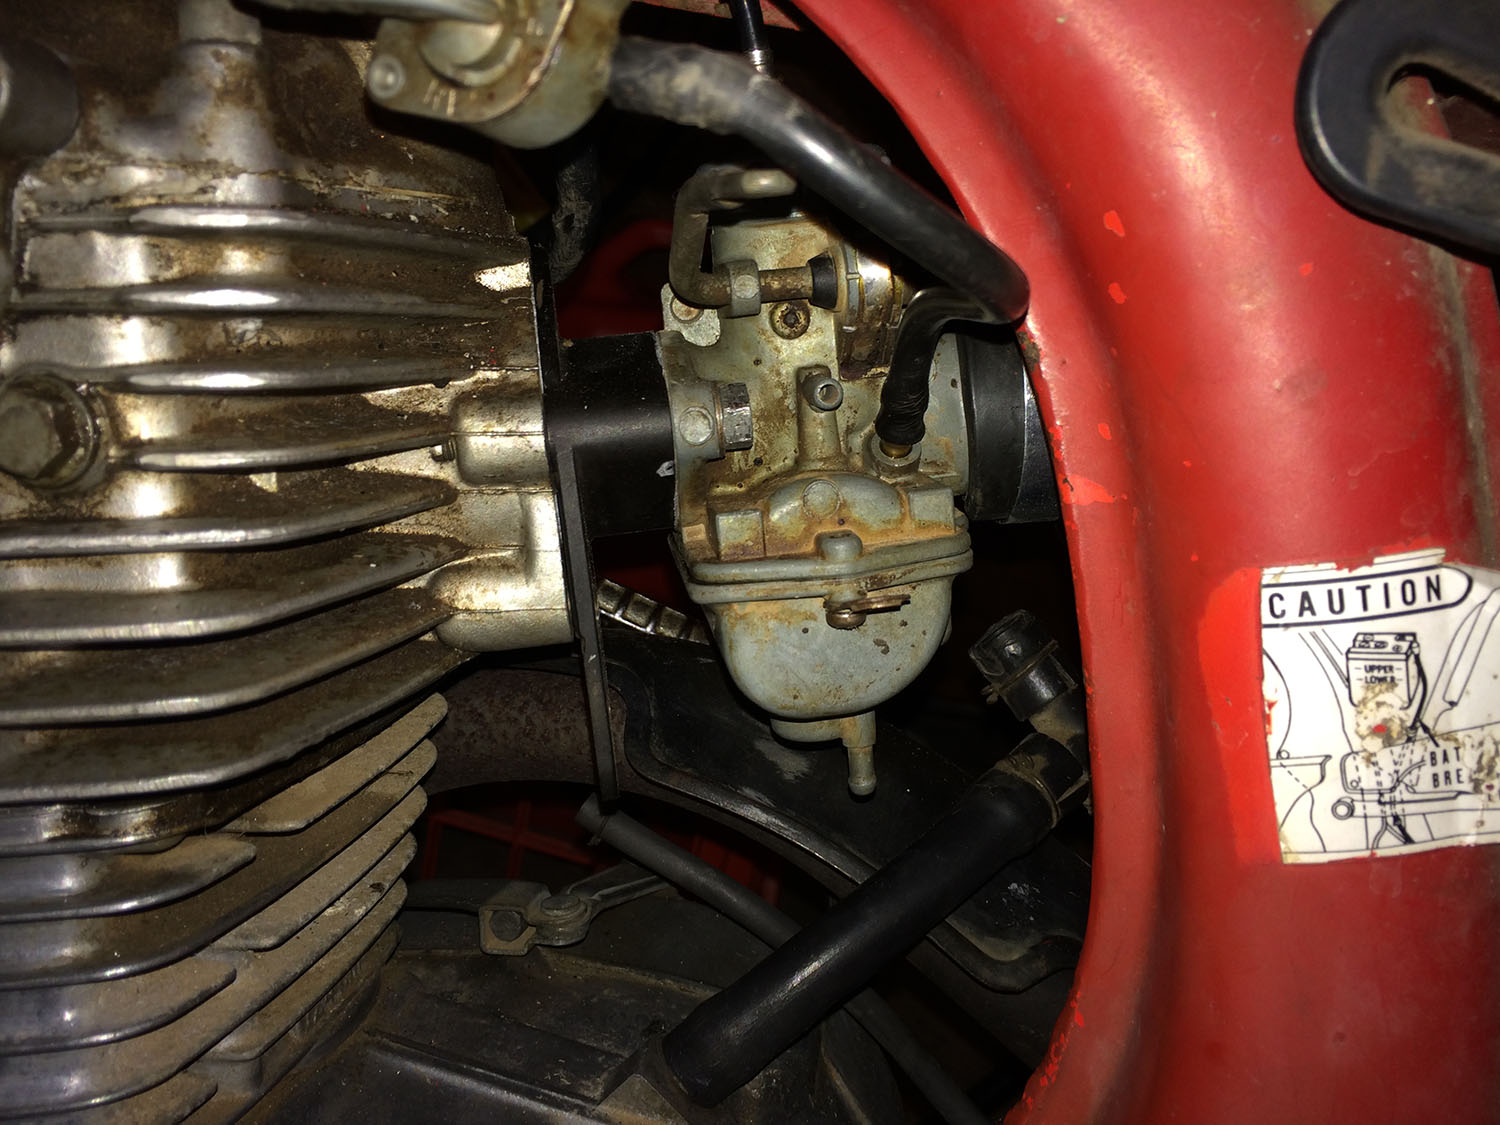
Carburetor Reinstalled
I then put a spare tank I had lying around on and connected up the fuel line. I turned the petcock and waited… I expected that at any moment, some petrol would seep out of the seal or make it’s way down the fuel overflow…

Dry Carburetor
I started to get excited when the carburetor stayed bone dry around all seals and no extra fuel came through the overflow. In an effort to be thorough, I flew up to the local petrol station and bought/’filled a jerrycan with 98 octane and sped back to throw more petrol into the tank.
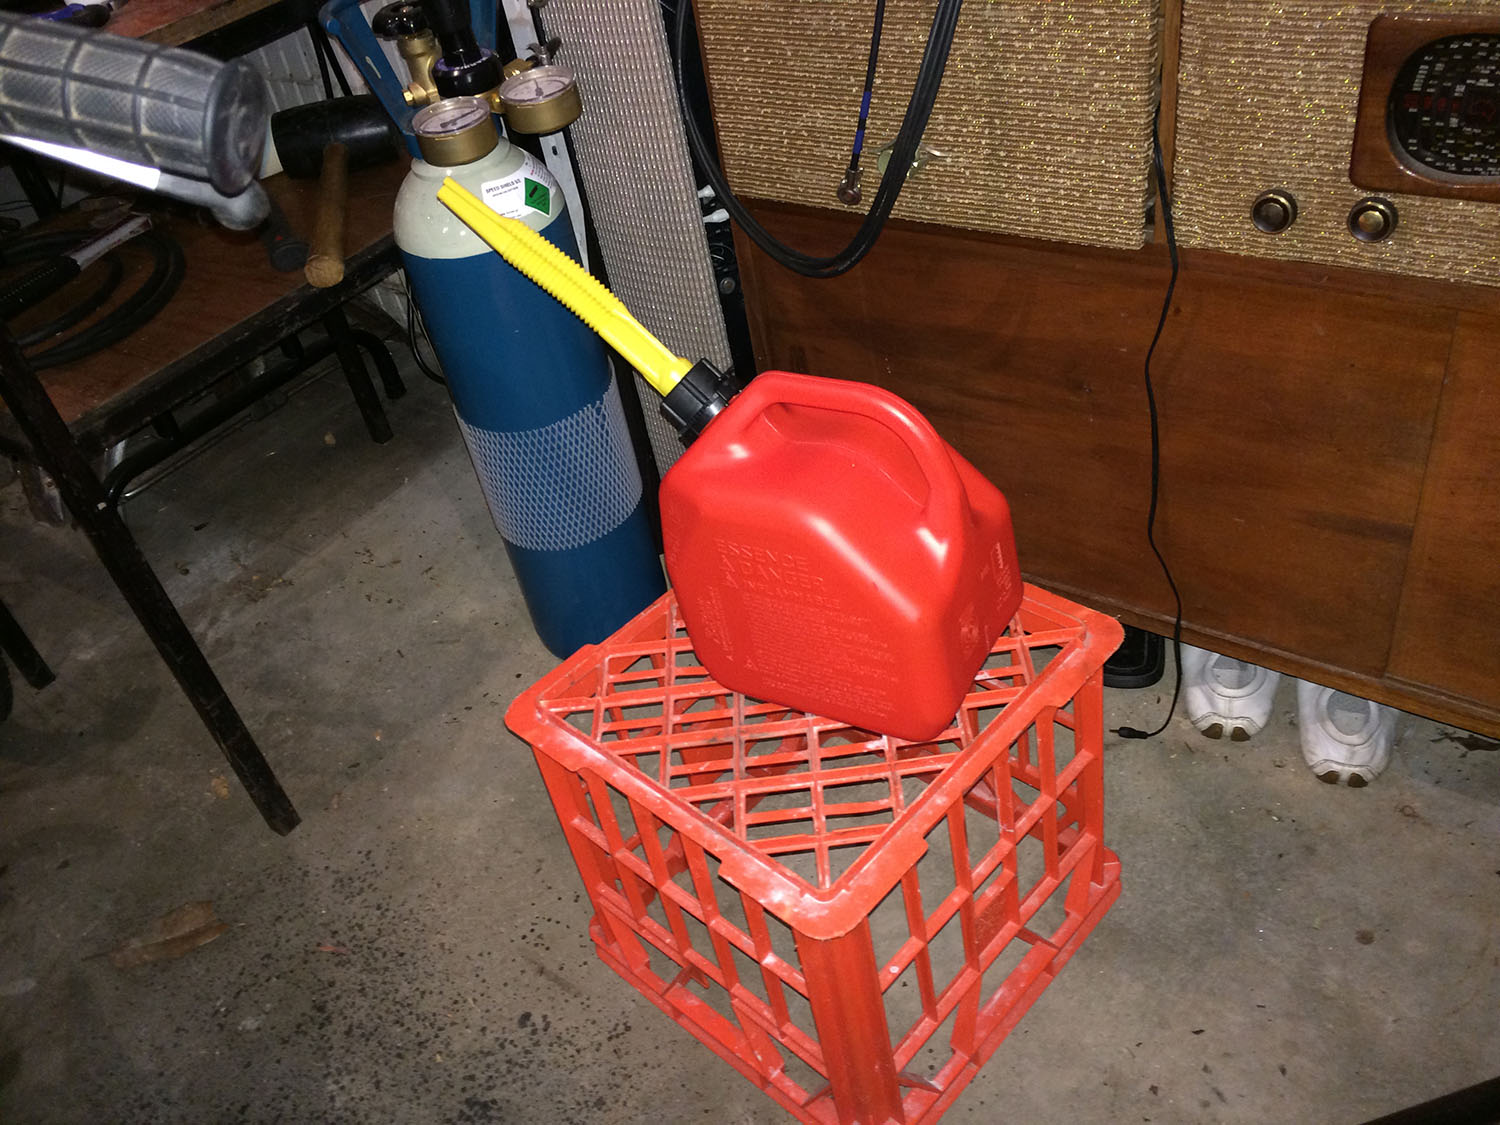
My Jerrycan
It was a sight to see… A fellow riding an R1 with a jerrycan strapped to the tail.
When I arrived home, I carefully poured further fuel into the tank and waited watching the freshly rebuilt carburetor closely. Not a drip presented itself where it shouldn’t! I had done it!
In an excited attempt to confirm my success, I opened the choke, gave the throttle a few tugs, ensured the bike was in neutral, and tried kicking her over. To my frustration, it didn’t kick over and start, however it did feel like it was trying to a bit more than normal, but it was late, and rather than let my mind play tricks on me, I turned the ignition and fuel petcock off, and went to bed.
Fingers crossed, she is on the brink of starting, and I hope that all she needs is a little coaxing and nothing more!